Category Archives: How To

Suet for Birds

IMG_1014
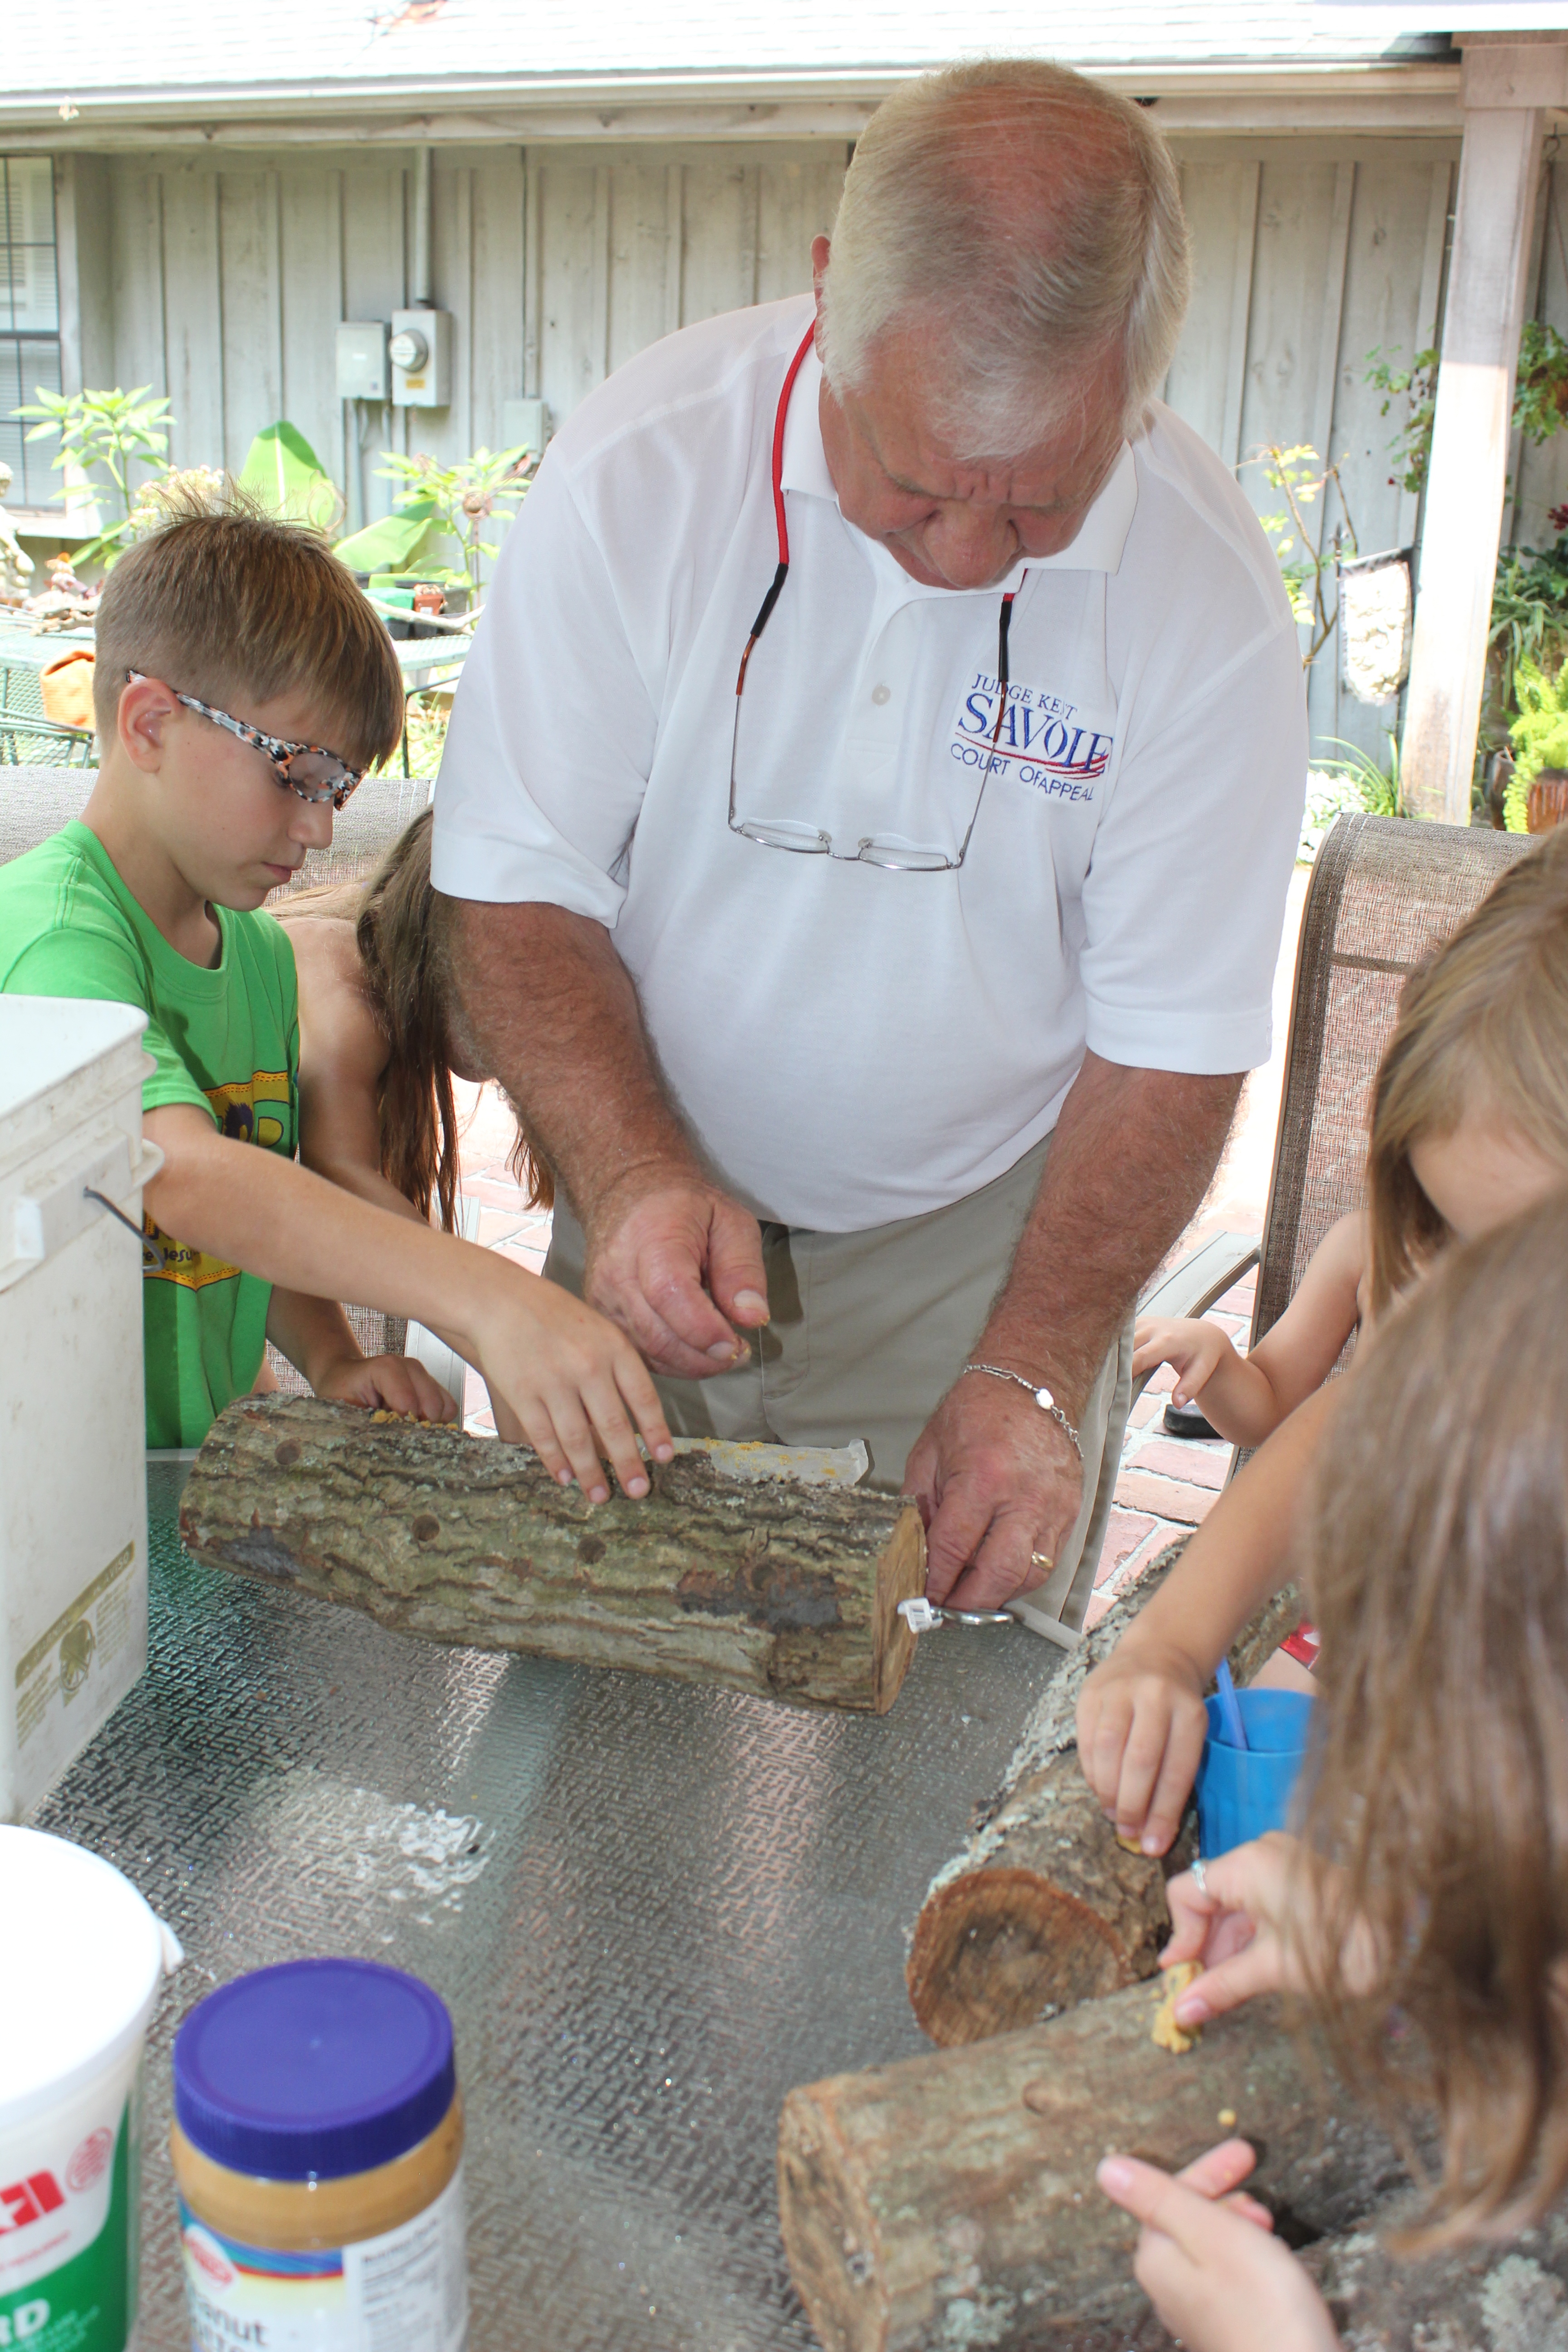
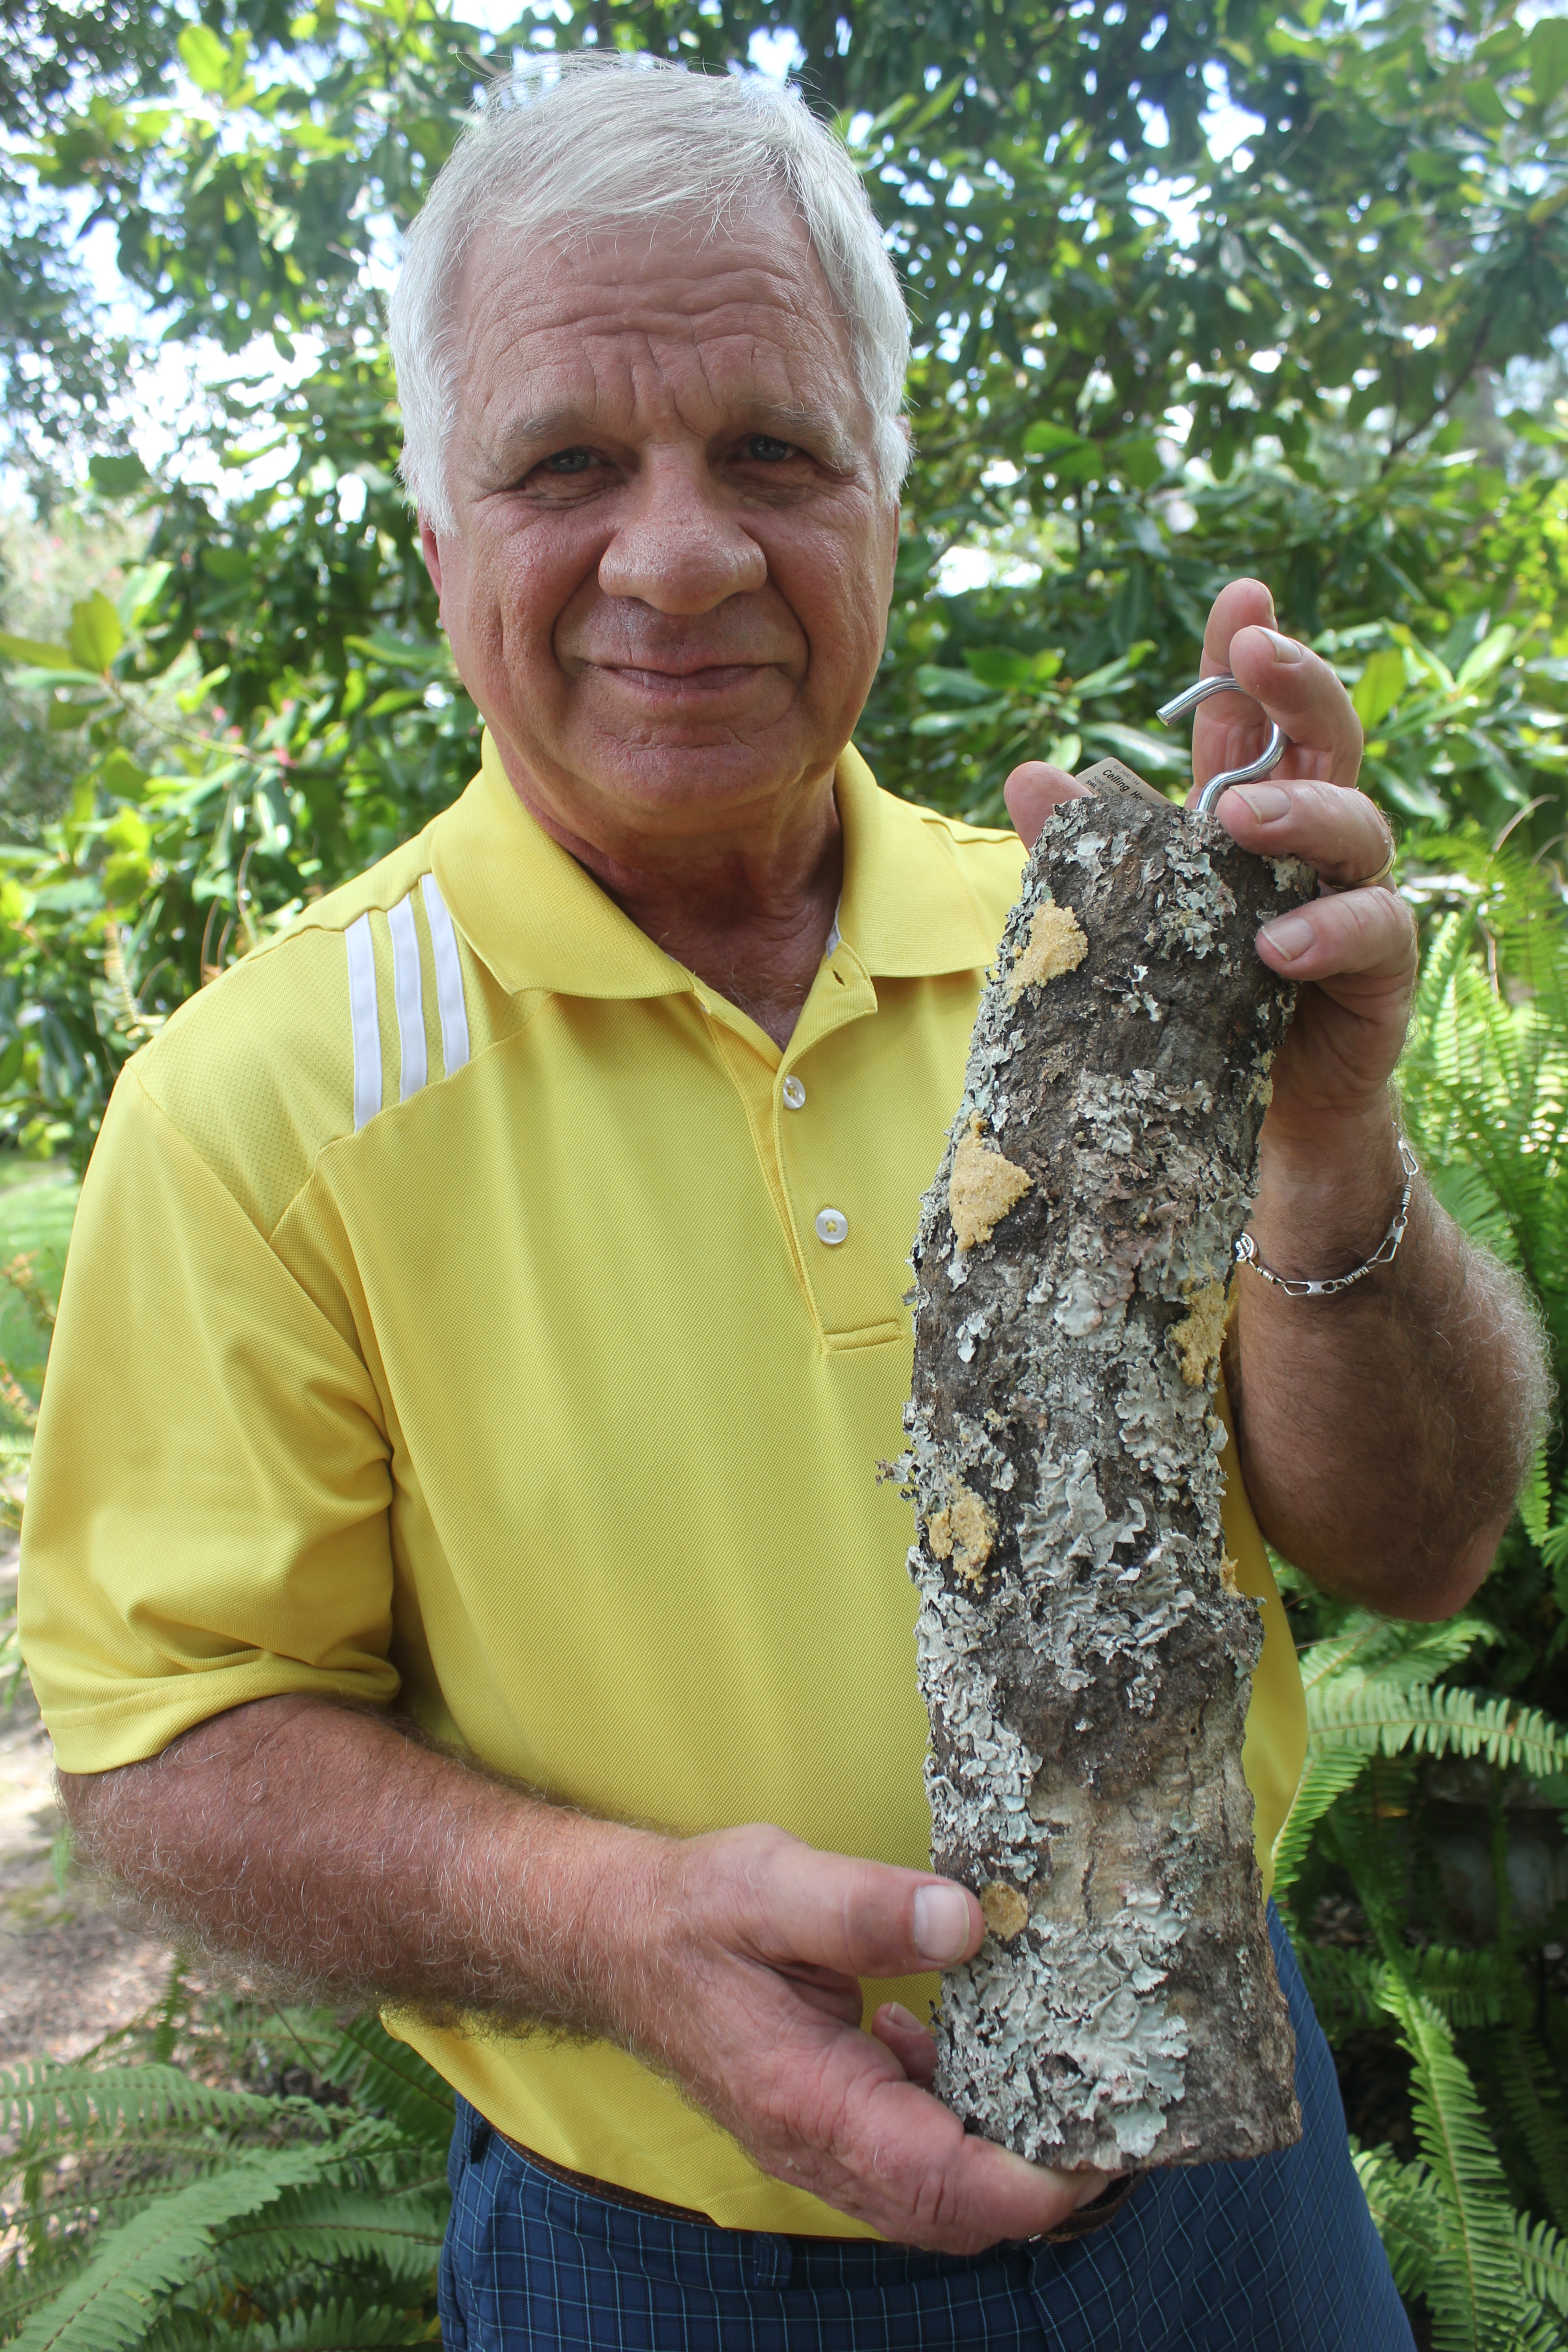
When Pat and I hosted this year’s Cousin Camp for the grandchildren, the kids and I made each family a bird feeder and stuffed it with homemade suet.
by Kent Savoie

Ingredients

1    cup    lard
1    cup    peanut butter, smooth or crunchy
3    cups    cornmeal
1/2    cup    wheat flour

Method 

Melt lard and peanut butter together.

Add cornmeal and flour, mixing well.

Cool slightly to thicken and pour into container.

Stuff mixture into holes drilled in a log, then hang for birds to feed.

Refrigerate or freeze extra to store.

IMG_0838

1 Comment

Filed under Cooking Crafts, How To

Pie Crust

IMG_9560

by Pat Savoie, who insists that homemade pie should be served on Thanksgiving.
Single Pie Crust Ingredients – 9 inch

1 1/3 cups    flour
1/2 tsp     salt
1/2 cup    Crisco, cold
3 Tbsp     water, cold

Double Pie Crust Ingredients – 10 inch

3 cups    flour
1 1/2 tsp    salt
1 1/8 cup Crisco, cold
6 Tbsp    water, cold

Method for Both Sizes

Mix flour and salt.

Cut in cold Crisco until small, pea-size pieces form.

Mix in cold water forming a large ball of dough.  Chill.

Place dough on floured surface and cover with wax paper. Roll out to form a 13 inch circle.

Place circle of dough in a pie plate being careful not to stretch.

Tuck in edges, then crimp to desired shape.  Chill.

Bake 375 for about 20 minutes or until golden.  Cool.
IMG_9557

Leave a comment

Filed under Dessert, Holidays, How To

Gingerbread House Party

For Christmas we hosted a Gingerbread House Party as a great gathering fundraiser for the girls’ Catholic school.  We prepared 17 houses with all the fixins as well as embellished aprons and Cinnamon Applesauce Ornaments as party favors. A Hot Cocoa Bar served as our refreshment station along with a Christmas Tree Cream Cheese and Crackers.  We are so thankful for our friends who donated their colorful Halloween candy and to Aunt Janet and Lauren who spent the weekend with us in the kitchen. Party hosted by Elizabeth Savoie Dronet

Martha Stewart’s Gingerbread House Kit recipe

This recipe makes five small houses using the template provided.

Ingredients

  • 1 teaspoon baking soda

    Set your table with a house for each child, a bag of icing, and a baggie of candy for decorations everyone will make together

  • 1/2 teaspoon baking powder
  • 1 cup (2 sticks) butter
  • 1 cup dark-brown sugar
  • 4 teaspoons ground ginger
  • 4 teaspoons ground cinnamon
  • 1 1/2 teaspoons ground cloves
  • 1 teaspoon finely ground black pepper
  • 1 1/2 teaspoons salt
  • 2 large eggs
  • 1 1/2 cups unsulfured molasses (a 12 oz jar)
  • 6 cups all-purpose flour

Directions

  1. Martha says, “In a large bowl, sift together flour, baking soda, and baking powder; set aside.”  I never do this step.
  2. In an electric mixer fitted with the paddle attachment, cream butter and brown sugar until fluffy. Mix in spices, salt, baking soda and baking powder. Beat in eggs and molasses.
  3. Add flour one cup at a time; mix on low speed until thoroughly combined.  Wrap in plastic or place in a covered bowl or pan. Chill for at least 1 hour.  You can freeze the dough at this point for future use.
  4. Heat oven to 350 degrees. On a well-floured surface (lots of flour will be needed), roll out dough to 1/8 inch thick. Cut into desired shapes, or using template instructions, if desired. Keep your knife clean so it will not tug on the shape. Place dough shapes on parchment covered baking sheets (ungreased); chill until firm, about 15 minutes. Bake 15 minutes, or until gingerbread is firm in the center, but not dark around the edges.
  5. Be sure you do not roll them too thin.  This will produce hard and brittle pieces that are not pliable enough to easily conform to your pattern.  They also will not have the surface area needed around the sides to grip the icing.

    Martha’s template

    We also created a small short cardboard box for the inside.  It was about  inch high. We glued the sides onto it with icing and then piped the corners together. Tip: Do not make boxes ahead of time because each box will need to fit the unique size of your house.  Each piece of gingerbread is not exactly the same.
    This size house fits nicely on a 10 inch cardboard cake circle, which can be purchased at Hobby Lobby or Michaels. Place the house off-center to provide space for a front yard and path.

Wilton’s Royal Icing That Dries Hard

Ingredients

First attach the pieces with icing and then go back over it to smooth out the imperfections and add a little cuteness.

3 Tbsp Meringue Powder  (A 4oz can makes three recipes of icing.)
1 lb Powdered Sugar
6 Tbsp Water for construction or 7 Tbsp Water for decoration

Method

In a mixer combine the three ingredients saving the last tablespoon of water to the side.  When the icing comes together, add the last tablespoon of water.  Beat on low for 10 minutes, scraping down the sides once or twice.  Transfer to decorating bags immediately and cover/close bag.  Keep icing moist by covering any exposed icing with a damp towel. Yield 3 cups.

We used one recipe to construct five houses using the template.  We provided a bag of icing for each participant with a little over 1 cup in each bag.  However, 1 cup would be enough. Just make a few extra bags to use if needed.

We like Wilton’s disposable 12 inch bags and cut the tip when the children were ready to decorate.  This kept the icing moist. Use a tall glass to help fill the bags.  Place the bag in the glass, tip down, then pull the sides over around the edge. Spoon in icing, remove from glass, and press out bubbles.  Tie off ends with a tight rubber band.  Any air exposure will quickly harden the icing. The recipe can be doubled and will just fit in my KitchenAid mixer bowl. Tip:Buy the meringue powder and decorating bags at a craft store with a 40% or 50% off coupon.

The Gingerbread Architect’s Green Rice Krispie Trees, Bushes, or Wreaths

Three recipes made 16 trees.

Ingredients

1 1/2 Tbsp Vegetable Shortening (Crisco)
20 regular marshmallows (or 2 cups mini marshmallows)
Green food coloring
3 cups Rice Krispies

Method

In a large saucepan, combine shortening and marshmallows.  Cook on low heat, stirring until the mixture is smooth. Stir in food coloring drop by drop until you reach the color you desire.  (We used the color paste.)  Stir in Rice Krispies until well coated. Use mixture immediately.  Drop onto parchment paper and shape into cone trees, square hedges, or circular wreaths. Roll in sugared glitter if desired. This recipe makes 3 1/2 cups and can easily be doubled.  It does not produce sticky trees like the traditional treat recipe would.  These do not stick to your hands when shaping and dry hard to the touch.  Decorate with sugar candies.

Candy Decoration Ideas

Each child was given a baggie of treats to begin the decorating process.  We started off creating things as a group and then released the kids to gather items from the candy buffet in clear plastic cups to create their own decorations.  We provided an example house, example ideas on a piece of cardboard, and printouts from websites for inspiration.

Included in the Baggie

  • 2 small candy canes for the door (Participant had to break to size.)
  • 4 square pretzels for windows
  • apple ring for wreath
  • 2 green gumdrops for a bush
  • large gumdrop and lollipop for lamp post
  • 3 goldfish crackers for pond (We came around to sprinkle blue sugar over the icing.)
  • 1 small gingerbread man and 1 small gingerbread teddybear
  • 1 gumdrop peppermint man already assembled
  • We walked around with the tray of Christmas trees and let the child choose one.

Candy Buffet 

Bridge

Many children visited the candy bar and made the following:
  • pretzel sticks and orange candy for a fire or stack of logs
  • fishing pole from pretzel sticks and twizzlers
  • berries/flowers and bows from twizzlers that had been cut into pieces
  • ladders from pretzel sticks
  • chimneys from red

    Fire

    starburst

  • candy paths and fences
  • candy cane hearts
  • gumdrop animals
  • snowmen from marshmallows
  • shingles from golden grahams
  • bushes with fruit loops

    Candy Cane Hearts, Starburst Chimney, Candy Path, Icing Hair or Beard for Gingerbread Man

    Gumdrop and Pretzel Animals or Reindeer

Sample ideas on cardboard

Gingerbread Aprons

We tied each apron to the backs of the chairs.

You’ll Need:

Child-size aprons in red, black or white.
One roll of Christmas ric rac
2 Gingerbread Men buttons per apron (Pack comes with 10.)

Instructions:

Cut ric rac to fit across the apron leaving a little to fold around the sides and onto the back side of the apron.  Pin and sew on the machine to attach.  Fabric glue did not work well in this case because the ric rac was too textured. Even the parts that stuck, later came unglued with wear.  After two attempts at gluing, the sewing method proved to be much faster and more likely to hold up to washing.  Sew buttons by hand to attach.

We put gingerbread men on the boy’s aprons and gingerbread women on the girl’s. If time allows, you can personalize the apron with the child’s name.

Embellish Aprons with Ric Rac and Gingerbread Men Buttons

This ric rac and button embellishment was both cute and cost effective. It also was not too girly for the male participates. All items can be found at Hobby Lobby.

Leave a comment

Filed under Cookies, Cooking Crafts, Entertaining, Holidays, How To

Yogurt

When my twins began eating baby food, I was inspired to make my own organic yogurt to feed them. My mother had a yogurt maker when we were kids, and I’ll never forget how good that yogurt tasted, especially with fresh blueberries we picked in the yard. After reading the book French Women Don’t Get Fat, I ordered myself a yogurt maker and started experimenting with recipes. Mom and I decided we liked this one best. The almond extract gives the yogurt a slight cherry flavor. Years later, I still prefer the taste and texture of this yogurt over anything you can buy in the store. I like to make a batch on the weekend to be eaten as breakfast and snacks during the week.

by Elizabeth Savoie Dronet

Ingredients

1 quart (4 cups) whole or 2% milk
1 Tbsp yogurt as a starter
4-6 yellow packets of Splenda (can substitute sugar to taste)
1 tsp almond extract (can substitute vanilla)

Method

In a medium saucepan heat milk until it reaches 110-115 degrees F. Stir regularly. In your measuring cup mix the tablespoon of yogurt with a spoon of the milk until smooth. Pour into warm milk and stir to throughly mix. Add Splenda and extract.

Ladle into 7 jars. Do not put on lids yet. Place in yogurt machine for 8-10 hours.

Remove from machine and cover with lids. You may drain off any liquid if desired. Store in the refrigerator.

Serve with our whole lot of nuts granola or our cherry, almond, cinnamon granola. You can also mix in orange marmalade  or any other jam to make a fresh fruit topping.

This is the Yogurt Maker I recommend.

2 Comments

Filed under Breakfast, How To

Bento Box Lunch Basics

My girls love their “cute lunches” and insist that I make them most every day. It’s a way I can send an I love you message to them at school. While the traditional bento box usually includes rice, meat, fruit and vegetables, my version usually has a sandwich, protein, fruit and vegetables. I do send molded sushi rice on occasion, but sandwiches are just easier.  I have found the best selection of bento supplies at Fit, a Japanese dollar store in Bellaire, Texas near Beltway 8. However bento supplies can easily be found in grocery and craft stores if you know what to look for. My girls have learned to save cupcake toppers from birthday parties so I can reuse them in their lunch boxes!  Adding a little cuteness to your child’s lunch does not take long and is very appreciated.

by Elizabeth Savoie Dronet

Stackable bento box with elastic band.

We decorated the inside divider of the bento box with cupcake stickers that are the clear vinyl type from Hobby Lobby.

Collection of food picks, small forks, and nori punches are stored in a jewelry organizer.

Here is an example of how to pack a bento box: line bottom with lettuce or spinach leaves, punch face out of nori (seaweed paper used in sushi rolls) and place on boiled egg half, roll slices of meat and thread onto long food pick, tuck in cherry tomatoes and cheddar slices cut into shapes.

In the second half, which is a smaller container, I've placed peanut butter and jelly Ritz cracker sandwiches.

Square sandwich boxes are also great to pack cute lunches. Cut sandwiches into shapes and decorate the top with cheese, cold cuts, dried fruit or veggies. Here I've cut out the bunny's eyes with a straw and attached carrots and veggie bologna with mayo. Peanut butter can also be used as a glue.

Find extra large carrots in Asian grocery stores. Slice without peeling and cut into shapes with small metal cookie cutters. Serve with ranch dip if desired. Here we cut flowers and added celery sticks for stems or grass.

Here is a sampling of sandwich cutters available.

Place warm boiled eggs in these molds and dunk in cold water for 10 minutes. The smaller mold is for quail eggs. Place molded eggs in water with a few drops of food coloring or dye with pickled beet juice. Recipes for quail eggs and pickled beets are on Savoie Secrets.

Keep your eyes open for small containers to divide items in the bento box or to pack them separately. The green bear is great for granola to sprinkle on yogurt cups. The red and yellow containers are perfect for dips. Decorate with vinyl stickers to add some fun.

Molded sushi rice with nori punch faces. I colored the rice pink with pickled beet juice. They look like Pac-Man ghosts to me!

For more lunch ideas click the Lunch Box category on the right side of the screen.

You may also enjoy browsing these recipes: Quail Eggs, Pickled Beets, Halloween Lunches, Jello Shapes, I had a Little Chicken Deviled Eggs, and Miniature Pies.

1 Comment

Filed under How To, Lunch Box, Sandwiches, Vegetarian

Apple Cinnamon Glue Ornaments

Growing up, my mother always found a Christmas project for the kids to make.  Usually it was an ornament for the tree: felt Santas with sequins, ribbon pinecones, stained glass figures.  I love seeing all those handmade ornaments that still hang on her tree. My favorites are the salt-dough angels from the 1970s and the painted wooden ornaments my parents made when they were first married.  Here is a recipe for dough ornaments that smell fantastic and are sure to delight the kids in your family.  At our Gingerbread House Party we plan to have kids decorate these ornaments with glitter glue and take them home as their party favor.  Go ahead and make some ornaments today and memories for tomorrow. 

by Elizabeth Savoie Dronet

Ingredients

1 1/2 cup cinnamon, plus more for dusting (Buy about 3 2.37 oz bottles.)
1 cup plain applesauce
1/4 cup white school glue

You will also need:
Rolling pin
Parchment paper
Placemat or other smooth surface to roll dough on
Cookie cutters
Straw
Patience

Method

1.  Combine all three ingredients in a mixer or by hand.  Mix until the dough forms a ball and is no longer crumbling.  If needed, add a teaspoon of water.

2.  Turn out dough onto cinnamon dusted surface. Dust the top with cinnamon and roll out with a rolling pin. You may need to turn the dough over and dust the other side once more to ensure it does not stick to the surface. Do not roll dough too thin or it will curl during the drying process.  Tip: Look at the cookie cutter you plan to use for an idea of how thick to roll the dough.  Some cutters are thinner than others.

3.  Place cut out ornaments onto a parchment lined baking sheet.  Use a straw to create holes for the ornament to hand from ribbon.  This recipe made 15 medium sized gingerbread men and four small stars. This filled two cookie sheets.

4. Recombine the dough scraps either back in the mixer or by hand.  Use smaller cookie cutters as the dough amount lessens rather than rolling the dough thinner.  We like small stars and hearts.

5.  Place ornaments on the parchment lined sheets in a 200 degree oven.  Cook for about 2 hours turning them over every 20 minutes.  It is important to turn them over to reduce the amount of curling.  We have tried the traditional method of leaving them out on a cooling rack for two days, turning occasionally, but this method did not work as well as the oven method.

6.  Remove from oven and leave out over the next 24 hours to ensure they are completely dry.  Decorate with glitter glue or sharpies.  Write the child’s name and year on the back.  Hang them on the tree using ribbons or string.  You can also use them as gift tags.

7. After Christmas store in a ziplock to help keep them smelling great.  You can also refresh the smell with cinnamon spray if desired.

We first made these ornaments for a playgroup three years ago.  Those ornaments are still looking and smelling good.

Leave a comment

Filed under Cooking Crafts, Holidays, How To

Freezing Okra

Just like Paw Paw, I love to plant and eat okra.  It’s tall hibiscus-like foliage and flowers are resistant to the heat and drought of late summer, and it bears fruit by the multitudes.  To save some of the harvest for gumbos when the weather cools, blanch and freeze the okra to preserve its freshness.

By Elizabeth Savoie Dronet

Method

First wash the okra then divide into small pods and large pods.  Bring a large pot of water to a boil.  Prepare an ice water bath in a large bowl to stop the cooking process.

For small pods, blanch (boil) for 3 minutes and then transfer to the ice water bath. I like to use tongs, but you could also use a large slotted spoon.

For large pods, blanch for 4 minutes and then transfer to the ice water bath.

After they have cooled, use a sharp knife to cut away the stems and then slice the remaining pod for freezing.  Store in a zip top freezer bag by removing as much air as possible.  I like to put enough okra in each bag for one gumbo.  That way I just take the bag out the freezer and dump the entire contents in the pot.

If you’d rather fry the okra, dredge the blanched slices in the flour or cornmeal mixture and freeze on a cookie sheet before transferring to a zip top bag.  Let us know if you have a favorite recipe for fried okra.

Larger sized pods

Leave a comment

Filed under Freezes Well, How To, Vegetarian

Gumbo Roux Basics

by Pat Savoie

Mix 3/4 cup flour and 3/4 cup oil. Heat and stir constantly with a flat bottom spoon.

Cook unti it's the color of burnt peanut butter.

Add 2 chopped onions, which will cool down the roux.

Allow onions to cook until they begin to turn clear.

For Chicken and Sausage Gumbo:
Add browned chicken and sausage remembering to add water to the bottom of the pan to remove bits of browned chicken. Simmer about an hour until chicken is falling off the bone. (Chicken breasts can be used, but you will miss the flavor that the bones add just like when you make homemade chicken soup.) Remove the chicken from the gumbo and discard the bones and skin. Return the chicken to the pot adding water depending on the desired thickness of the gumbo. Simmer, skimming off excess oil. Before serving, add chopped green onions.
For Seafood Gumbo:
Seafood can be used instead of chicken. I like shrimp and crabmeat. Shrimp only take about 10 minutes to cook. Add the crabmeat last and stir gently to keep the lumps from falling apart. Don’t forget to add the chopped green onions.

For Shrimp and Okra Gumbo, see this recipe.

Elizabeth likes okra in her vegetarian gumbo. If you like, drop an egg into the boiling pot and let it cook for about 7 minutes before you are ready to serve.

Ladle over cooked rice. Many serve potato salad as a side dish.

Leave a comment

Filed under How To, Main Dish, Seafood, Vegetarian